
Getting started
Three steps, about two minutes: add the keyboard, allow Full Access, and allow pasting from other apps. Everything stays on your device — the keyboard makes no network calls.
1. Add the keyboard
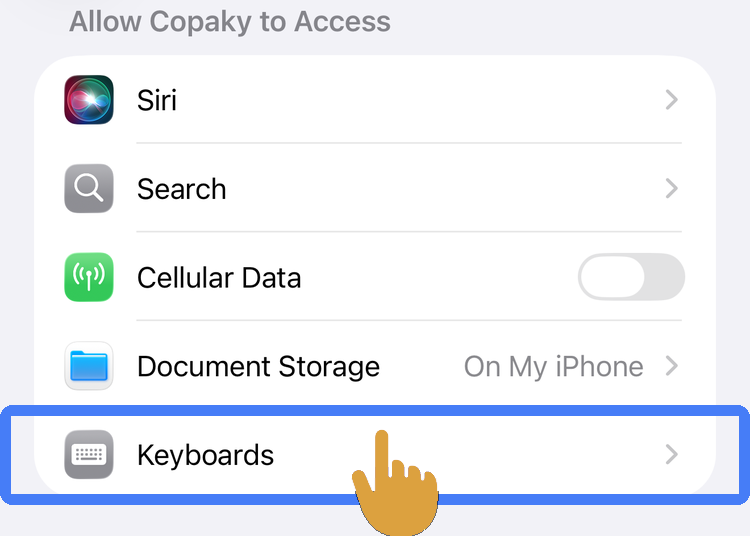
iOS keeps third-party keyboards switched off until you add them yourself — this is the one step every keyboard needs, not something specific to Copaky.
Where to do it: Settings ▸ Apps ▸ Copaky ▸ Keyboards ▸ turn on "Copaky."
2. Allow Full Access
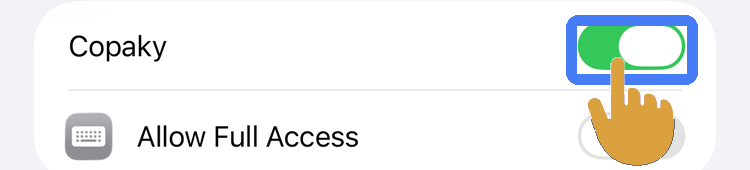
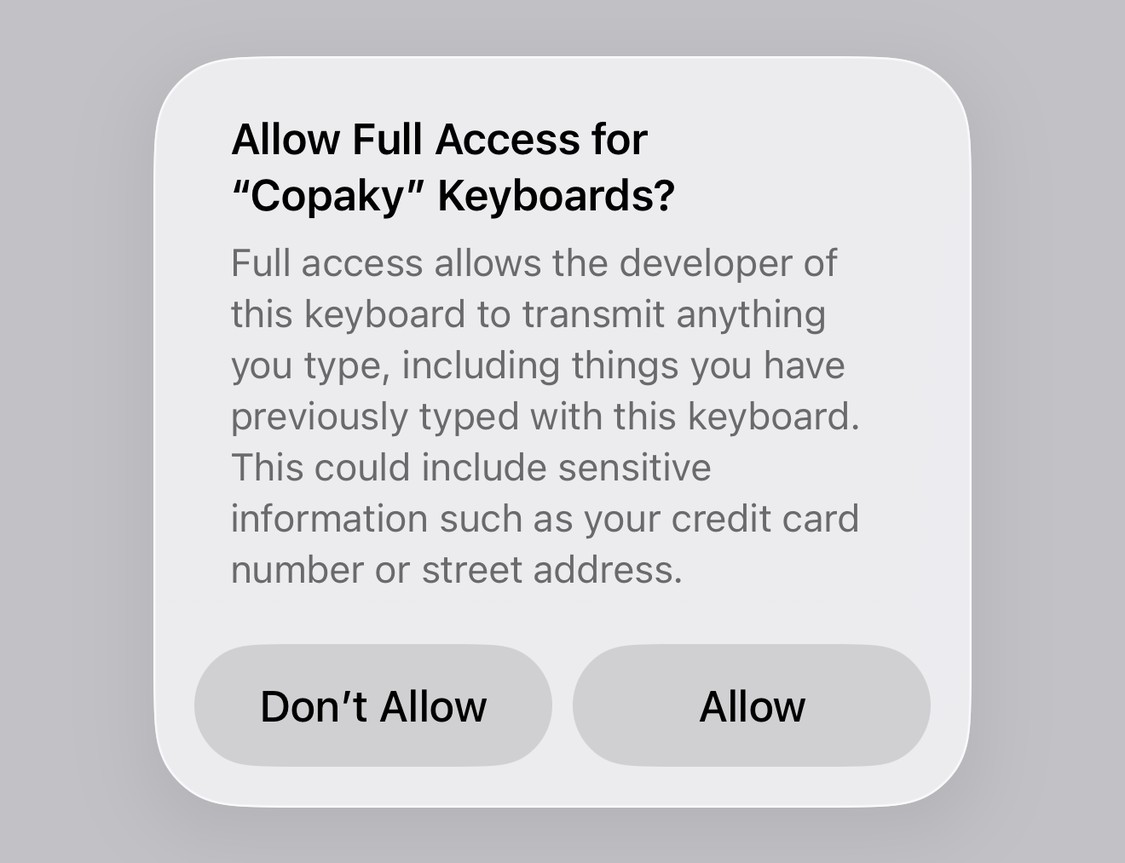
Full Access unlocks keyboard haptics, the paste key, and the clipboard history tab. The data it reads stays on your device — the keyboard makes no network calls — and you can turn Full Access off again whenever you want.
Where to do it: Settings ▸ Apps ▸ Copaky ▸ Keyboards ▸ turn on Allow Full Access.
3. Allow pasting from other apps
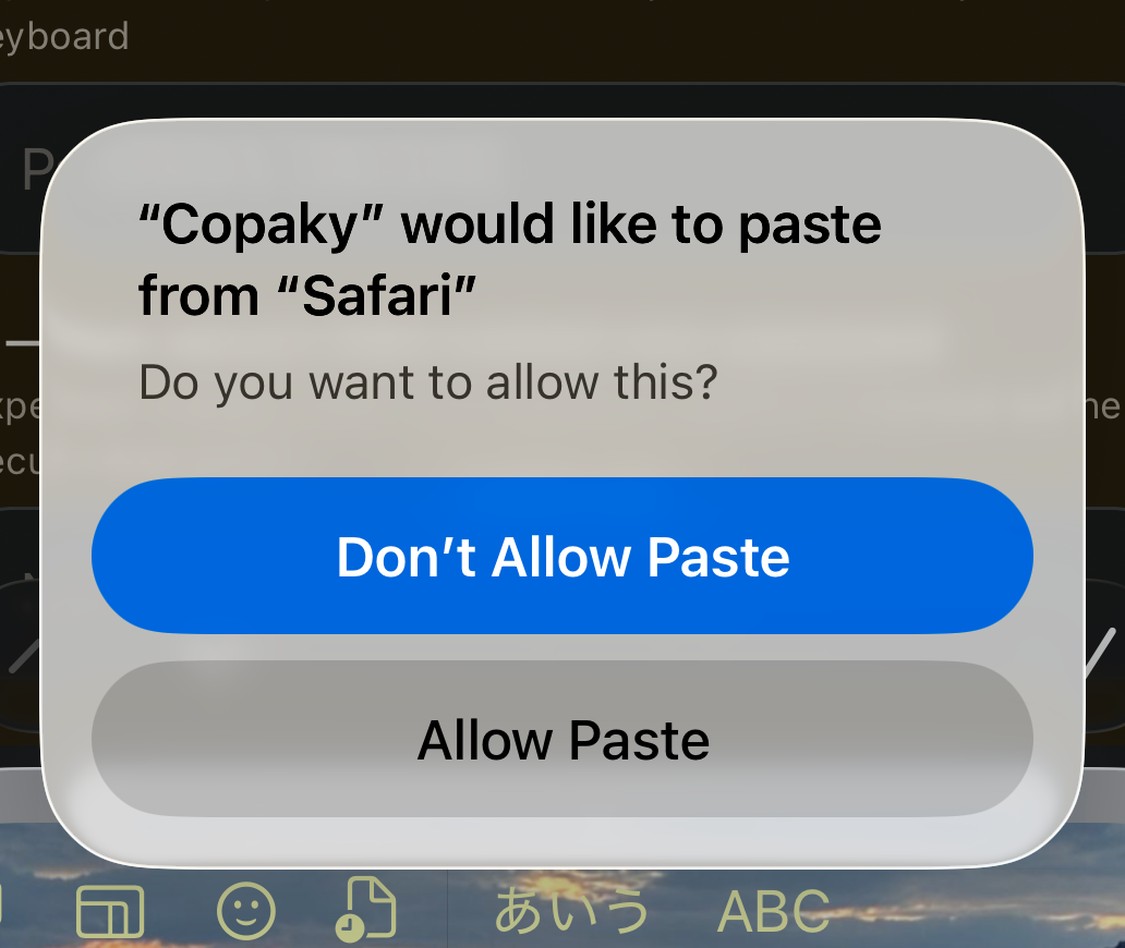
Without this, iOS shows its own "Allow Paste" prompt every time the clipboard history tab reads what you've copied. Turning it on stops that repeated prompt.
Where to do it: Settings ▸ Copaky ▸ Paste from Other Apps ▸ Allow.
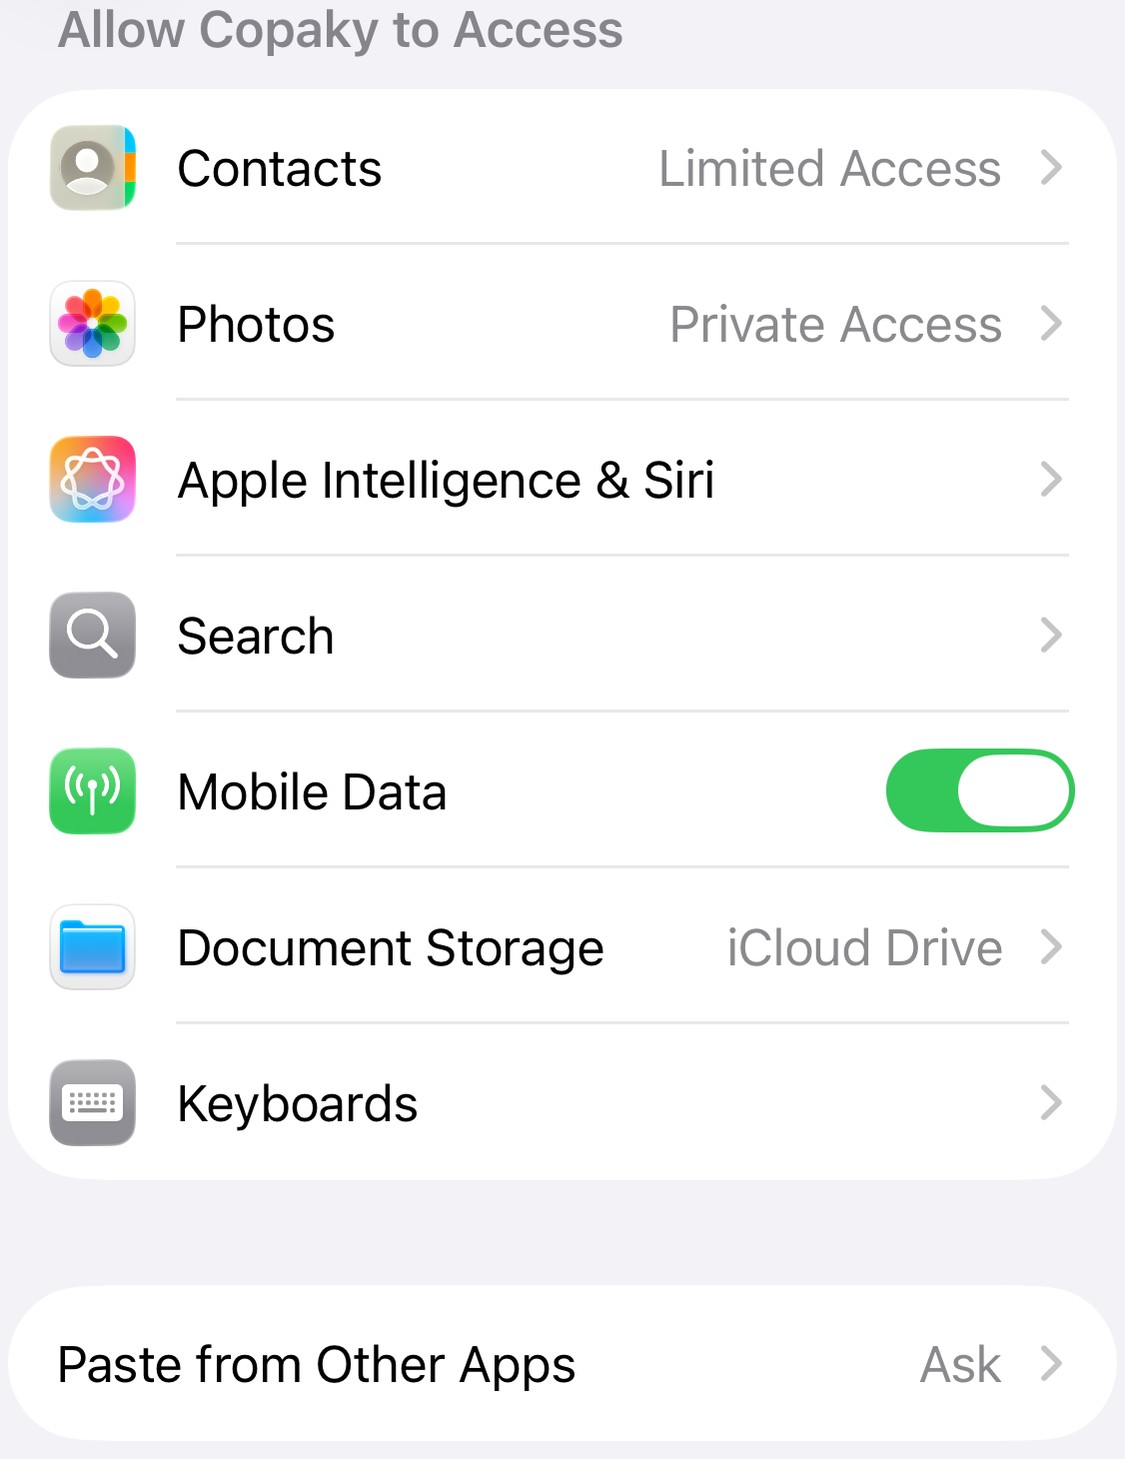
Where to find it in the app
The same steps are also inside the Copaky app itself, if you ever want to check them again: Tips ▸ Getting started, and Settings ▸ About Copaky ▸ Getting started.
What to do next
A few things worth knowing once the keyboard is set up:
- The language key (あ/A/IT) cycles through your active languages and shows which one comes next; long-press it to jump straight to the one you want.
- Turn on "Use Italian" in Settings to add Italian to that cycle and get Italian suggestions on the Latin tab. The editable "Active languages" list in the same Settings screen controls the cycle order — Japanese stays pinned first, English is always on, Italian can be reordered.
- On the Italian tab, typing a word without its accent and pressing space replaces it with the accented form when that's the more common spelling — "perche" becomes "perché."
- The numbers and symbols tab follows the active language too — the Japanese tab, for example, keeps its space and return keys labeled in Japanese (空白, 改行).
- The clipboard history also opens with a long-press on the 123 key (the default; the #+= and ☆123 keys can be added as openers in Settings — a small badge marks the enabled keys).
- Two opt-in extras, both off by default under Settings ▸ Usability: a real number row above the QWERTY letters ("Add a number row to QWERTY") and sliding the space bar to move the cursor on the alphabetic QWERTY layouts — English, Italian and Japanese romaji ("Slide space to move the cursor").